
DIY: Build Your Own Backyard Compost Bin
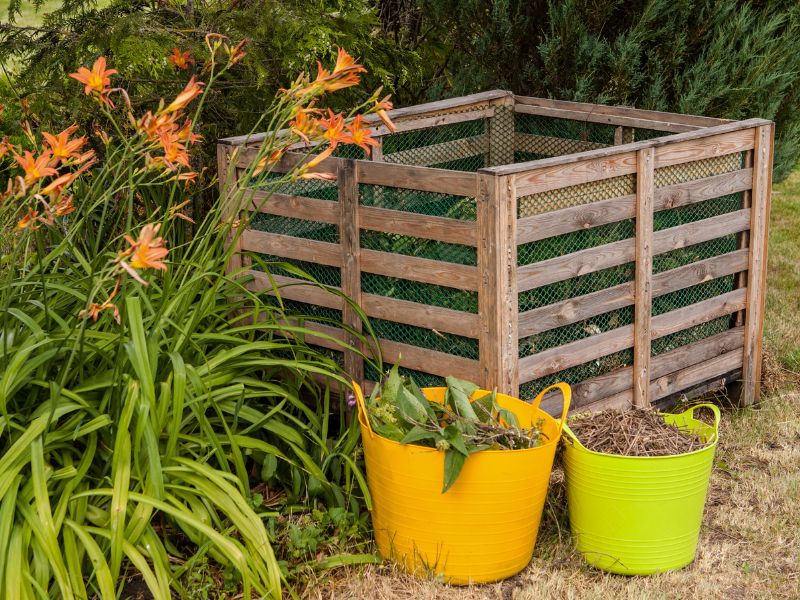
Stackable Wooden Compost Bin
The stackable wooden compost bin requires minimal carpentry skills to build. The cost depends largely on the quality of materials used, but you can expect it to cost around $50 when using cedar planks. Materials can also be obtained for free by scavenging wood from old fencing. The wooden compost bin consists of several stackable tiers and is designed to make turning the compost pile easy. To turn the pile, remove the uppermost tier and place it on the ground next to the bin. Fork compost into this tier until full; then stack another tier on top. Continue to add material and tiers from the old pile until finished.
Materials & Tools
(For a four-tiered, approximately 3 ft x 3 ft x 3 ft bin; dimensions can be converted as necessary)
- 16 wooden planks, approximately 36 inches long, 7.5 or 8 inches wide and 5/8″ or 3/4″ thick
- Each board must be cut to the same length for the tiers to stack. If you don’t have a circular saw, most hardware stores will cut for you.
- Dog-eared fence boards are a good option, but will result in individual boards just under 36 inches long.
- 16 pieces of 2″x2″ utility wood, cut to 6″ lengths
- 64 2” woodscrews
- Circular saw (optional), saw horse or firm work table, power drill, protective equipment for eyes and hands, and a spring clamp (optional, but recommended).
Building the Bin
- Align the long edge of one 2”x2” piece along the shorter edge of one ~36″ plank, ensuring their edges are flush; a clamp is recommended for stabilization while drilling. Make sure to offset the 2″x2″ piece about 2” above the long edge of the board, as shown in the photo. Drill 2 woodcrews through the board and 2″x2″ piece to fasten together
- Repeat the process in step 1 with a second 2″x2″ piece on the other short end of the same board. You now have 1 board with a 2″x2″ piece fastened to each end.
- Repeat steps 1 and 2 with another length of board and two more 2″x2″ pieces. You now have 2 boards, both with 2″x2″ pieces fastened to each end.
- Take one of the boards you have attached 2″x2″ pieces to, and one plain board piece. Form together into an L, creating a flush right angle along the short edge of the two boards. Again, a clamp is recommended for stabilization while drilling. Drill two woodcrews to fasten the second board piece into the 2″x2″ piece. You now have two boards connected into a right angle with a 2″x2″ piece at the vertex.
- Repeat step 4 with the other board that you previously attached 2″x2″ pieces to, and another plain board piece. You now have two sets of two boards connected into a right angle, each with a 2″x2″ piece at the vertex.
- Form the two L shapes you’ve created in steps 4 and 5 into a square, ensuring that the two boards you’d initially drilled 2″x2″ pieces into are placed opposite each other (Hint: these boards do not extend beyond the 2″x2″ piece). Drill two woodscrews into boards as needed to connect all pieces into a square. You now have one tier of your stackable bin!
- Repeat steps 1 through 6 three more times to assemble all four tiers.
Wooden Pallet Compost Bin
Create an inexpensive bin using wooden pallets. Wooden pallet bins have the added advantage of reusing pallets that would otherwise end up in the landfill. This design includes a removable front, making it easy to turn the compost.
Materials & Tools
- 4 wooden pallets
- 32 wood screws or some bailing wire
- 4 bolt latches
- Pliers, Wire cutter or tin snips, Work gloves
Building the Bin
- Assembly is easy; just screw or wire three of the pallets together.
- Attach bolt latches to the front edge of the bin and the last pallet to make a removable door.
Composting in Dry Climates
To reduce moisture loss in dry climates (like Southern California), line the bin with plastic. Staple a sheet of plastic to three sides of the bin and a separate plastic sheet to the front door. Or, line the sides with pieces of pre-soaked cardboard.
Multi-Bin Variations
Convert a one-bin pallet composter into a two-bin system by adding 2 or 3 pallets. In a two-bin system, the compost is turned by emptying the full bin into the empty one If you have lots of compostable material, expand your operation to a three-bin system. Build the pile in the first bin, turn it into the second for further decompostion, and turn it into the third for curing.
Wire Mesh Compost Bin
The wire mesh compost bin is an affordable composting solution. It can be constructed for under $20 and is easy to maintain. To turn the pile, simply unwrap the bin and set it up next to the pile of materials; then fork the materials back in.
Materials & Tools
- 10-ft length of 1/2-in. hardware cloth (3 to 4 ft tall) OR 16-gauge plastic coated wire mesh (for a 3-ft diameter bin)
- 4 metal or plastic ties OR some heavy wire (to twist into ties)
- Pliers, Wire cutter or tin snips, Work gloves
Building the Bin
- Unroll hardware cloth or wire mesh and trim off any excess wire. Trim or bend over ends to fit them flush with the cross wires. This will eliminate loose edges that may poke or scratch hands.
- Bend the hardware cloth or wire mesh into a circle and securely attach ends with the ties or several pieces of heavy wire.
Composting in Dry Climates
To reduce moisture loss in dry climates (like Southern California), line the bin with moistened cardboard or 6 millimeter black plastic:
- Cut a piece of plastic into an 11 ft x 4 ft rectangle.
- Line or wrap the bin with plastic and fold any excess over the top edge of the bin. Secure with clothespins if necessary.
Get Creative with Your Materials
Composting can be as easy to start and easy to maintain as you would like it to be!
Depending on your space, schedule, desired level of involvement, available materials, and imagination, there are composting styles to fit every personality!
REMEMBER …
- For best results, place your bin directly on soil to invite vital decomposer microorganisms into your bin!
- Your browns (carbon) to greens (nitrogen) ratio should be approximately 50/50 by weight. This ends up being about 1 part greens per 2 parts browns by volume, but will depend on the density of materials used.
- The greater diversity of compostables you put in, the more nutrient-rich your end product will be!
- Bury food scraps in the center of the pile to keep odors and pests at bay.
- Relax and have fun!
Questions? Call or email our ROTLINE: compost@solanacenter.org | (760) 436-7986 ex. 700
There are a great diversity of methods and processes that all produce this wonderful soil amendment! Don’t be afraid to explore the many options to find a composting style that suits you best!
[…] or Public Works department. You can learn how to construct your own low-cost compost bins here, or purchase a full-price bin through the Solana Center online […]